
Edition 62
Capturing iOS Simulator Network Traffic with Appium
The next couple editions of Appium Pro will be about capturing network requests made by devices during a test. If we can access network requests from our test code, we could make assertions based on specific requests being sent to our server, or assert that the data in network responses are displayed in the UI. We can also capture network data to help debug issues when tests fail. We could also make assertions on the performance of our network calls, by checking the timing between requests and responses.
It's relatively easy to get network logs from Chrome and Safari sessions, since the browser debug ports make that information available, but what if we want to capture requests made by native apps?
The solution is to use a man-in-the-middle proxy. A proxy of this sort is a program which we insert between the device and the internet. We tell the device to route all requests through our proxy, which records the traffic as it passes through. Not only does it record it, but the proxy we will be using can also be configured to modify the traffic. This opens up more potential uses in testing: we can test the failure cases when certain urls can't be reached, and we can modify responses to suit our needs for consistent data.
Man-in-the-middle proxies also do a lot of tricky work breaking the security built into networking systems. Capturing someone's encrypted HTTPS traffic is what malicious attackers would want to do. We are but humble testers, but how is the system to know that? The proxy does a lot of work to give us fake authority to decode encrypted network traffic, once we perform some initial setup.
With a proxy we can even modify the network responses our device receives, allowing us to test with less random values. We can also use this technique to force the app into a particular state we want to test. All from within our test code, involving no changes to the app.
For these articles, we will use a proxy called mitmproxy. Much of the web testing and Selenium world is used to using Browsermob Proxy, but I ran into many difficulties trying to use it. As of this writing, Browsermob Proxy hasn't been updated in two years and has some strict limitations. For example, Browsermob proxy is unable to forward HTTPS requests which target an IP address directly instead of using a hostname. This is what my Android emulators do, regardless of the way my app is written.
Mitmproxy has an active ecosystem, modern tools, and lots of helpful documentation. I think we benefit from its wide use by researchers and security professionals rather than just testers.
Perhaps mitmproxy's drawback is that it is written for Python developers, and hasn't been used much in testing to this date. I'd like to change this. The example code in today's edition will be in Javascript, and in a later edition I plan on introducing a package for interacting with mitmproxy from Java.
Alright, on to the setup!
Setting up mitmproxy for iOS Simulators
Our goal here is to run mitmproxy and have traffic from the iOS simulator pass through the proxy on it's way to the internet. Then we can inspect requests which mitmproxy logs. First we'll set up everything manually, and then put together the Python script which runs it all in the context of a test.
Whenever in doubt, I suggest reading the first several pages of the mitmproxy documentation. It helps to de-mystifty what we're trying to put together and may help you get back on the rails of this tutorial if you encounter issues.
Install mitmproxy. You may need to make sure you have Python3 and pip3 installed first. Installing this way is required for the Javascript library we will be using later.
sudo pip3 install mitmproxy
And then run it:
mitmproxy
The proxy runs on localhost port 8080 by default. The empty pane it displays should fill up with network traffic once we configure our simulator to point to it.
iOS simulators don't have their own settings for configuring a proxy, but they use the MacOS native network proxies. So the next step is to configure the entire host computer to use our mitmproxy. This means that the network traffic from whatever else our computer is doing will be mixed in with the simulator traffic, but we can filter it later.
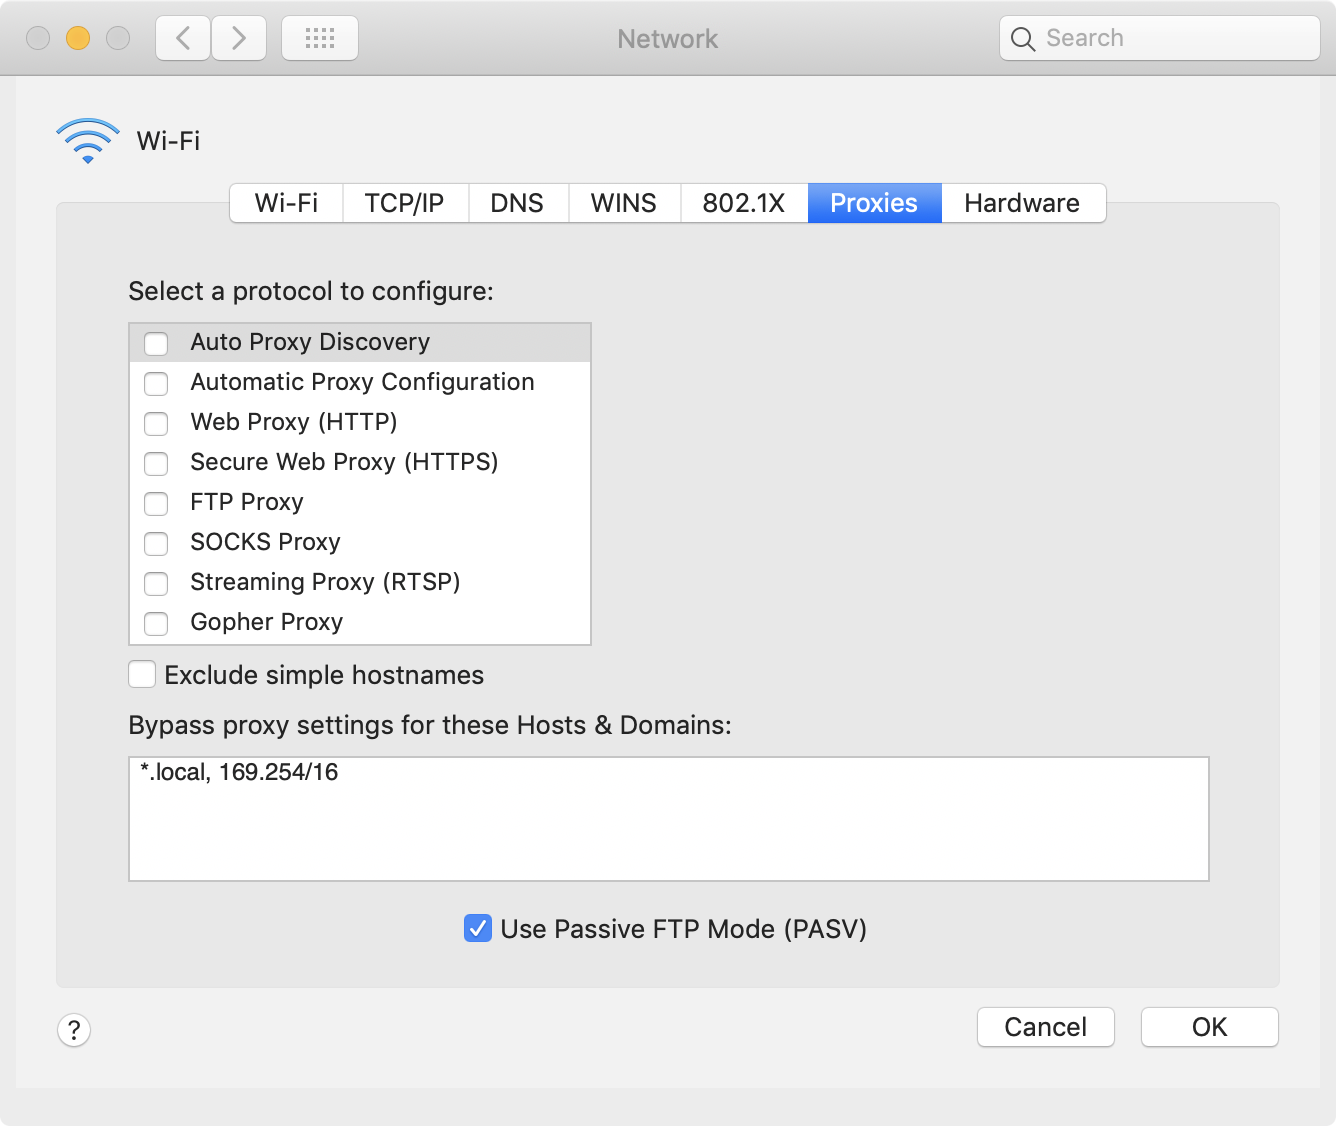
Open the Network Preferences, click on Advanced, and click on the Proxies tab.
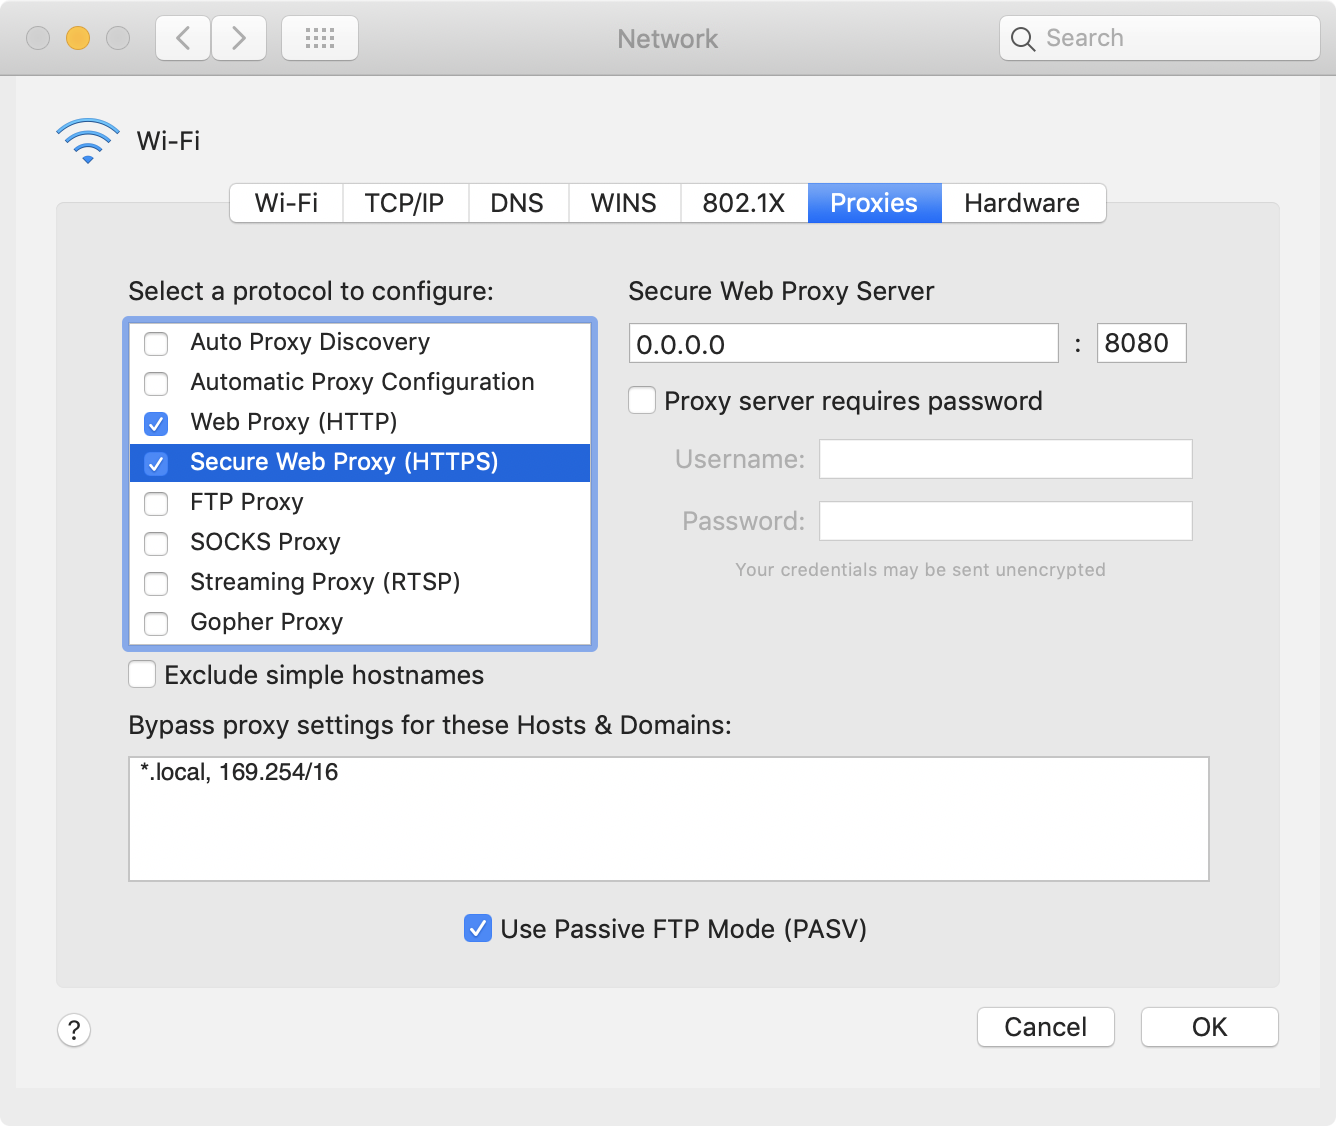
There are several kinds of proxy available, we want to enable both the Web Proxy (HTTP) and Secure Web Proxy (HTTPS). Check both proxy types and input the address of our mitmproxy server: 0.0.0.0 on port 8080. Click Ok and Apply.
Now, all system traffic should be going through the proxy. Let's check real quick. Open http://appium.io, and the page should load. Look at the mitmproxy UI and we should see some related network requests (use arrow keys to scroll down).
Now check https://appiumpro.com, it should fail. This is an HTTPS website and we haven't set our system to trust the mitmproxy ssl certificate. We're actually not going to do that at all because we only need to set it up for the iOS simulator, and trusting the certificate on the OS level will leave us unsecured if we forget to untrust it after we finish testing.
Next launch an iOS simulator and make the same check. Visiting http://appium.io in mobile Safari should work, while https://appiumpro.com should fail to load.
Now we want to install the mitmproxy ssl certificate on the simulator. Navigate to a special url hosted by mitmproxy: http://mitm.it. Click on the Apple logo and follow the instructions to install the certificate on the simulator.
New instructions for iOS 12.2 and later: iOS 12.2 changed the UI for intalling certificates. The next step, if to open the Settings app and go to General->Profiles tap on the mitmproxy profile and tap 'install' in the upper right corner. Continue with the next step below.
After following prompts and tapping the install button in the upper right corner, there's still one more step! Often, the new certificate is not fully trusted by default. Open the Settings app and go to General->About->Certificate Trust Settings and enable full trust for the mitmproxy certificate. Now we should be able to view https://appiumpro.com in Safari.
Traffic from Safari and native apps should now be logged in the mitmproxy UI!
Automating Certificate Installation
I listed the manual steps above because it's easier to debug and figure out if your setup is correct. Once running this all the time, if you have a new simulator to test on, you shouldn't have to perform this manual work. Appium can automate installing the certificate.
Use the mobile:installCertificate command, passing it a base64 encoded string of the mitmproxy certificate. Appium will automate the settings app and trust it for you.
Once mitmproxy is run once, the certificate files are saved to your home directory, so that's where we read them from.
Here's how I do it in our example test scripts:
let certificatePath = path.resolve(os.homedir(), '.mitmproxy', 'mitmproxy-ca-cert.pem')
let certificate = await fs.readFile(certificatePath)
await driver.executeScript('mobile:installCertificate', [{content: certificate.toString('base64')}])
Capturing Traffic Within a Node.js Test Script
Let's insert code to start mitmproxy before our test, then filter and access the captured traffic so we can make assertions on it.
There are a couple different approaches to this. What I really want is the ability to programmatically start mitmproxy and access the requests within my test. Mitmproxy is designed with a nicely-featured addon framework which supports plugins written in Python. The way the designers expects you to run mitmproxy is as a standalone service, and pass python script files to it using the -s commandline flag. We could write a python addon and start/stop the proxy as a separate shell process, but I want to avoid that if I can.
Instead, I found a great little Node.js module which starts mitmproxy as a separate process and loads a special Python addon which opens a websocket connection so that we can get information in our Javascript code while the proxy is running.
The following test opens our usual demo app, TheApp, opens our pickerwheel demo, and taps the button. This action results in the app sending a request to history.muffinlabs.com which returns some historical events for the app to display.
The test starts mitmproxy and logs all requests sent by the app to an array. At the end of the test, we verify that the request we expected the app to send was indeed sent.
let test = require('ava')
let fs = require('fs-extra')
let os = require('os')
let path = require('path')
let { remote } = require('webdriverio')
let Mitmproxy = require('mitmproxy').default
let proxy, driver
let interceptedMessages = []
// this function will get called every time the proxy intercepts a request
let requestHandler = (message) => {
  let req = message.request
  console.log('************************************')
  console.log('mitmproxy intercepted a request')
  console.log(req.method)
  console.log(req.rawUrl)
  console.log(message.requestBody.toString())
  console.log('************************************')
  interceptedMessages.push(message)
}
test.before(async t => {
  // start mitmproxy
  proxy = await Mitmproxy.Create(requestHandler, [], true, true)
  driver = await remote({
    hostname: 'localhost',
    port: 4723,
    path: '/wd/hub',
    capabilities: {
      platformName: 'iOS',
      platformVersion: '12.1',
      deviceName: 'iPhone XS',
      automationName: 'XCUITest',
      app: 'https://github.com/cloudgrey-io/the-app/releases/download/v1.9.0/TheApp-v1.9.0.app.zip' // in order to download, you may need to install the mitmproxy certificate on your operating system first. Or download the app and replace this capability with the path to your app.
    },
    logLevel: 'silent'
  })
  // if the mitmproxy certificate was not installed manually already. Only needs to run once per simulator
  let certificatePath = path.resolve(os.homedir(), '.mitmproxy', 'mitmproxy-ca-cert.pem')
  let certificate = await fs.readFile(certificatePath)
  await driver.executeScript('mobile:installCertificate', [{content: certificate.toString('base64')}])
})
test('getting the event for a day, via request to history.muffinlabs.com', async t => {
  let pickerDemo = await driver.$('~Picker Demo')
  await pickerDemo.click()
  let button = await driver.$('~learnMore')
  await button.click()
  // wait for alert
  let alertIsPresent = async () => {
    try { return await driver.getAlertText(); } catch { return false; }
  }
  await driver.waitUntil(alertIsPresent, 4000)
  await driver.dismissAlert()
  t.true(interceptedMessages.length > 0)
  t.true(interceptedMessages.some(m => m.request.rawUrl == 'https://history.muffinlabs.com/date/1/1'))
})
test.after.always(async t => {
  t.log('shutting down')
  await proxy.shutdown()
  await driver.deleteSession()
})
Modifying Network Responses Recieved By The Device
Mitmproxy allows us to get even more clever. Just changing a couple lines in the test above, we can intercept the app's request to history.muffinlabs.com and rewrite the contents of the response to contain the data of our choosing.
This can be useful in getting the app into a predictable state. The current code chooses a random historical event to display every time, but we can respond with a single event of our choosing and force the app to display what we want. We can also force the UI to display specific values, so we can test long strings, negative numbers, error states, etc, without having to actually set up the necessary context on the backend. All this can be done from the test script!
let test = require('ava')
let { remote } = require('webdriverio')
let Mitmproxy = require('mitmproxy').default
let proxy, driver
let interceptedMessages = []
// this is the response we will return from our proxy, instead of what the site usually returns
let injectedResponse = {
  date: "January 1",
  url: "https://wikipedia.org/wiki/January_1",
  data: {
    Events: [
      {
        year: "2019",
        text: "Tests Passed",
      }
    ]
  }
}
let requestHandler = (message) => {
  message.setResponseBody(Buffer.from(JSON.stringify(injectedResponse), 'utf8'))
}
test.before(async t => {
  proxy = await Mitmproxy.Create(requestHandler, [], true, true)
  driver = await remote({
    hostname: 'localhost',
    port: 4723,
    path: '/wd/hub',
    capabilities: {
      platformName: 'iOS',
      platformVersion: '12.1',
      deviceName: 'iPhone XS',
      automationName: 'XCUITest',
      app: 'https://github.com/cloudgrey-io/the-app/releases/download/v1.9.0/TheApp-v1.9.0.app.zip' // in order to download, you may need to install the mitmproxy certificate on your operating system first. Or download the app and replace this capability with the path to your app.
    },
    logLevel: 'silent'
  })
})
test(`insert our own event for a day, assert that it's displayed`, async t => {
  let pickerDemo = await driver.$('~Picker Demo')
  await pickerDemo.click()
  let button = await driver.$('~learnMore')
  await button.click()
  // wait for alert
  let alertIsPresent = async () => {
    try { return await driver.getAlertText(); } catch { return false; }
  }
  await driver.waitUntil(alertIsPresent, 4000)
  let alertText = await driver.getAlertText()
  await driver.dismissAlert()
  // assert that the alertText is the same as the packet we injected
  t.true(/Tests Passed/.test(alertText))
})
test.after.always(async t => {
  t.log('shutting down')
  await proxy.shutdown()
  await driver.deleteSession()
})
That's all for this week. Sample code is on github, as usual. Next week, I'll show how to create the same setup with Android Emulators (spoiler: it's harder).