
Edition 40
How To Test On Real iOS Devices With Appium, Part 1
This is the first in a 2-part series on using real iOS devices with Appium. It's a tutorial on getting started from scratch, authored by Appium contributor Jonah Stiennon. Since getting set up with real iOS devices can be a long and involved process, this first edition will cover all the preliminary work you need to do to make sure Appium, your app, and your device will all be able to talk to each other. Stay tuned for next week when Jonah will show us how to put it all together.
This edition of Appium Pro is about getting started with a real iOS device test starting from scratch. Real iOS device testing can only take place on a Mac. (NB: This tutorial was written with OS X v10.14, Xcode version 10.0, automating an iPhone X S running iOS version 12.0.1. While the tutorial should remain largely correct for other versions, your mileage may vary!)
Organize Our Work Area
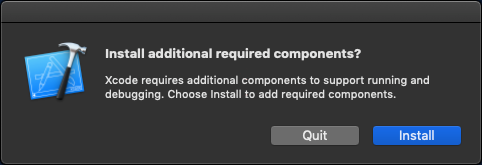
First things first, let's clean up our workspace and get ready to start a new project. Let's make sure all our software is up to date. To begin with, check that we have the latest version of Xcode installed. Then, since we will be using Homebrew, let's run brew update. Next let's launch Xcode in case it hasn't been launched before. (You will need to accept the End User License Agreement and may have to click a button to "install additional components").
Next we will install libimobiledevice, an open source package which is able to communicate with iOS devices. The only official applications made by Apple for communicating with iOS devices are Xcode and iTunes. These applications weren't built to easily allow programmatic use, which is why Appium uses libimobiledevice for certain operations.
brew install libimobiledevice
Appium also uses a package called ios-deploy for transferring iOS apps onto your device, so let's install that too.
brew install ios-deploy
WDA itself requires an iOS dependency manager called Carthage. Since Appium will be automatically building the WDA app, we need to install Carthage so it is available to the WDA bootstrap process.
brew install carthage
OK, now we've installed some things that Appium needs, but let's make sure we have Appium installed as well. I'm going to install the Appium Desktop App. Download the latest Appium-x.x.x.dmg file from the releases page. Open the file and drag the Appium.app icon into your Applications folder.
Finally, with the housecleaning on our Mac now finished, let's make sure our iOS device is set up:
- Turn the iOS device on
- Plug the device into your Mac
- Unlock the device
- Wait for a dialog to appear on the device and choose to "Trust" the Mac
Running tests on the device will always require you to unlock it. There are parts of this process where if the device is locked, things may get into a bad state and the only way to continue will be to unplug the device and plug it back in. In order to avoid any further issues (and annoyances), let's go into the Settings app, select Display & Brightness, select Auto-Lock, and set it to never, to ensure that the screen never locks on us mid-test. (Obviously this means it's a good idea to keep your phone plugged in, and maybe set the brightness down a bit to save some electrons).
Run App Manually Using Xcode
Before using Appium to run tests on our device, let's make sure we can manually run our app on the device using Xcode.
Opening the Xcode workspace for the app we want to test, we choose the device we want to run the app on by clicking the icon to the right of our app name by the ▶ button in the upper left hand corner. Xcode will usually automatically select our device once plugged in, but sometimes we have to select it ourselves.

My app is so new that I haven't set up Xcode with my developer profile. If you're like me, Apple will want us to register with them before I go any further. If I click the play button, it tells me I need a provisioning profile. Clicking on my app in the file browser on the left side of Xcode I'm brought to the main settings for the project.
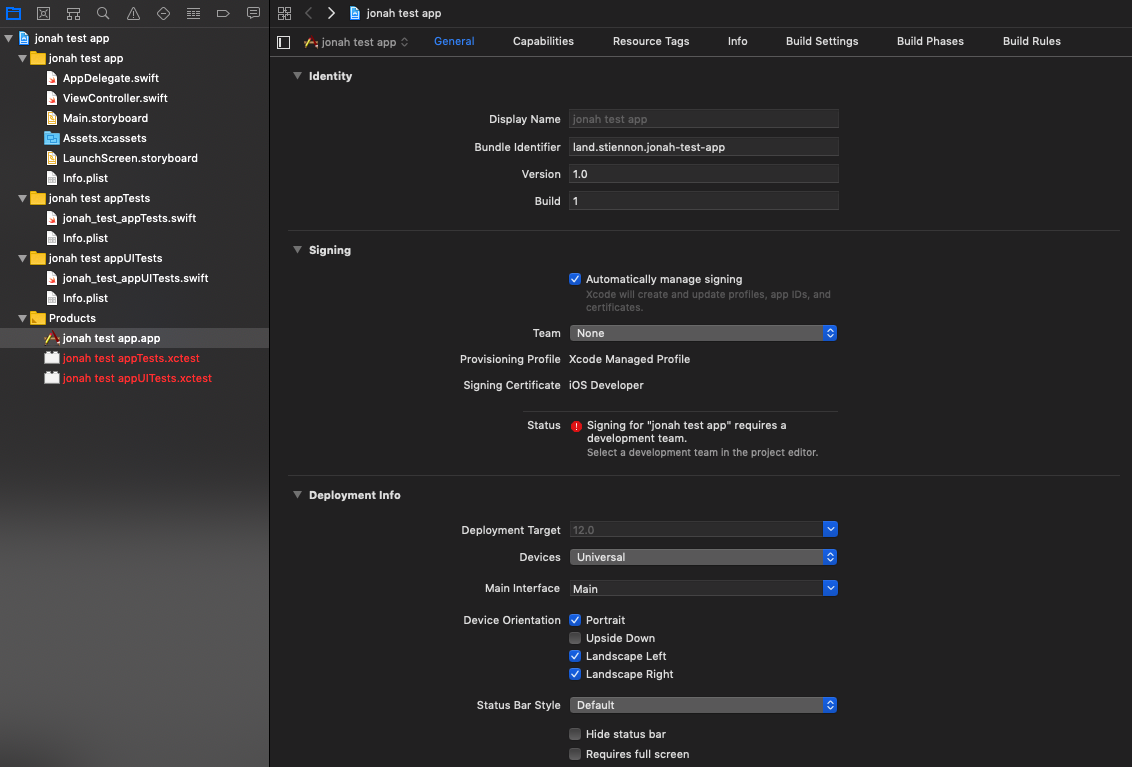
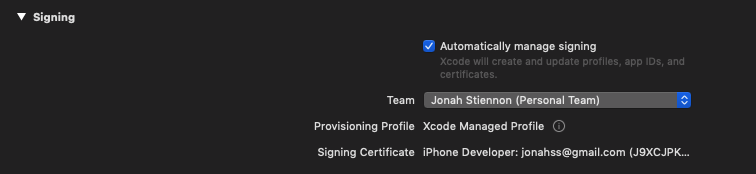
There's a warning sign in the "signing" section. Select the dropdown next to Team choose Add an Account. If I worked on a team with other people, at this point I'd be asking them to add me to their team which should already be set up to run this app. Sign in with our Apple ID, click on "manage certificates" and click the + button to add a new certificate. Xcode is helpful and handles the rest. Now we can go back to our app settings page and choose our name from the dropdown.
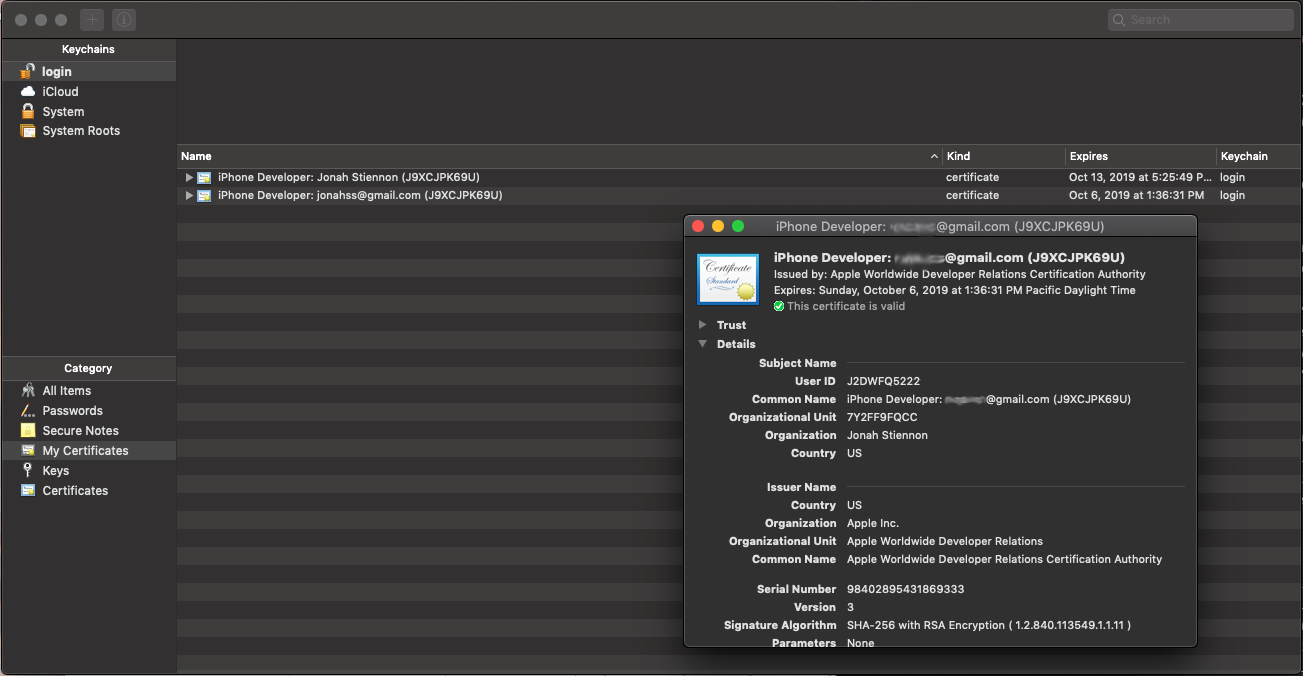
The certificate we created has an important piece of information we will need later. We need the "Organizational Unit" which is a way to identify our development team. Let's open the Keychain Access app on our Mac and choose My Certificates in the lower lefthand corner. Now the main panel will display our new developer certificate. Double-click on the certificate we just created to see its details. Make a note of the ten digit ID next to Organizational Unit.
Going back to Xcode, clicking the ▶ button again in the upper lefthand corner will attempt to run our app on the device, but another error is logged.
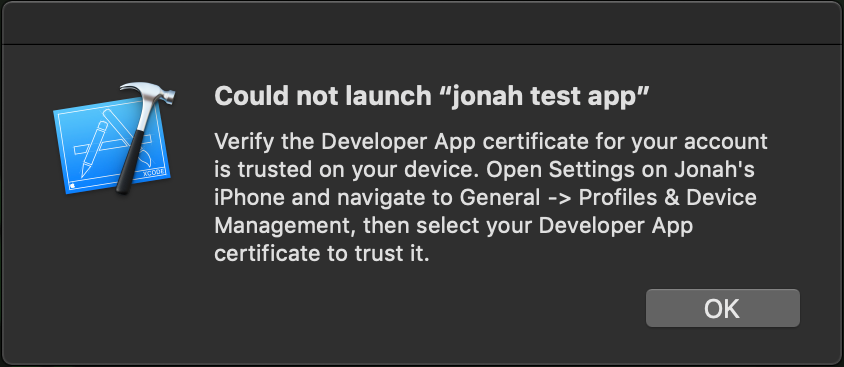
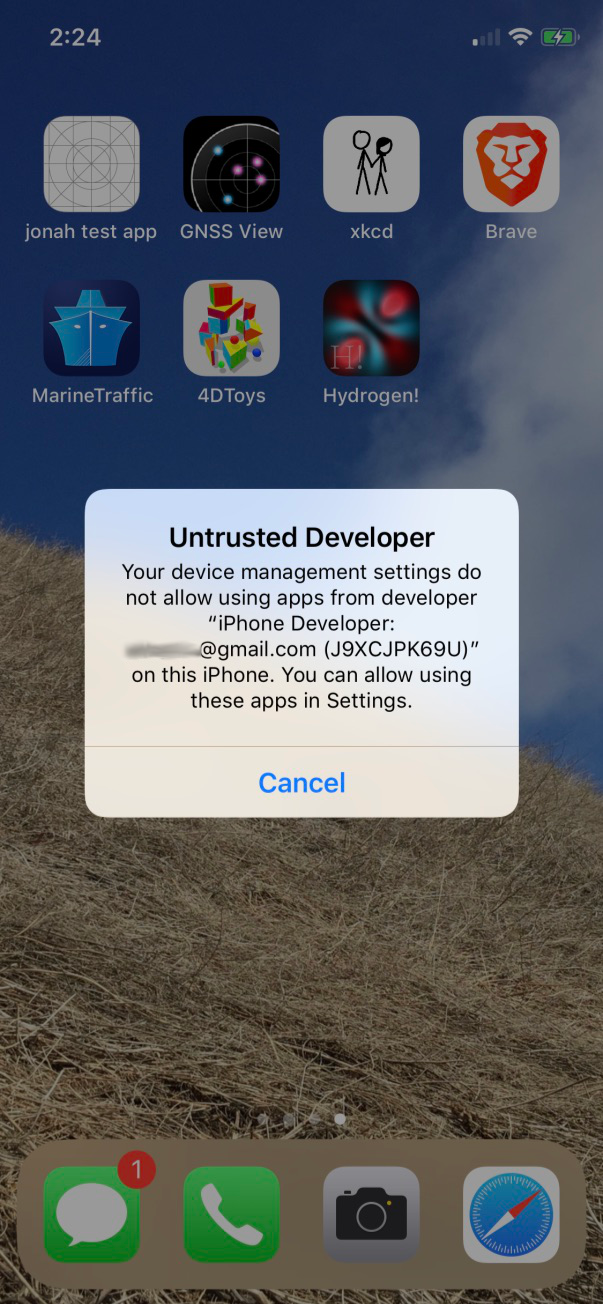
Xcode is telling us that in order for the device to run our app, the device has to trust our developer certificate. Normally, an iOS device will only run apps from the App Store. An app which is placed on the device but didn't come from the app store could be malicious. The device checks the certificate that the app was compiled with and will only trust official app store certificates. If we look at our device, we can see the app has been installed, it is only when the device tries to run the app that we encounter this error. As an interesting experiment, try manually tapping on the app on the device, this time the device (rather than Xcode) tries to instruct us how to trust the certificate.
We want the device to trust our certificate which we added to Xcode in the previous step, so now we will tell the device to trust it. Let's do exactly as it instructed, open the Settings app on the device, tap on General, tap on Device Management and pick the Developer App Certificate which we created earlier.
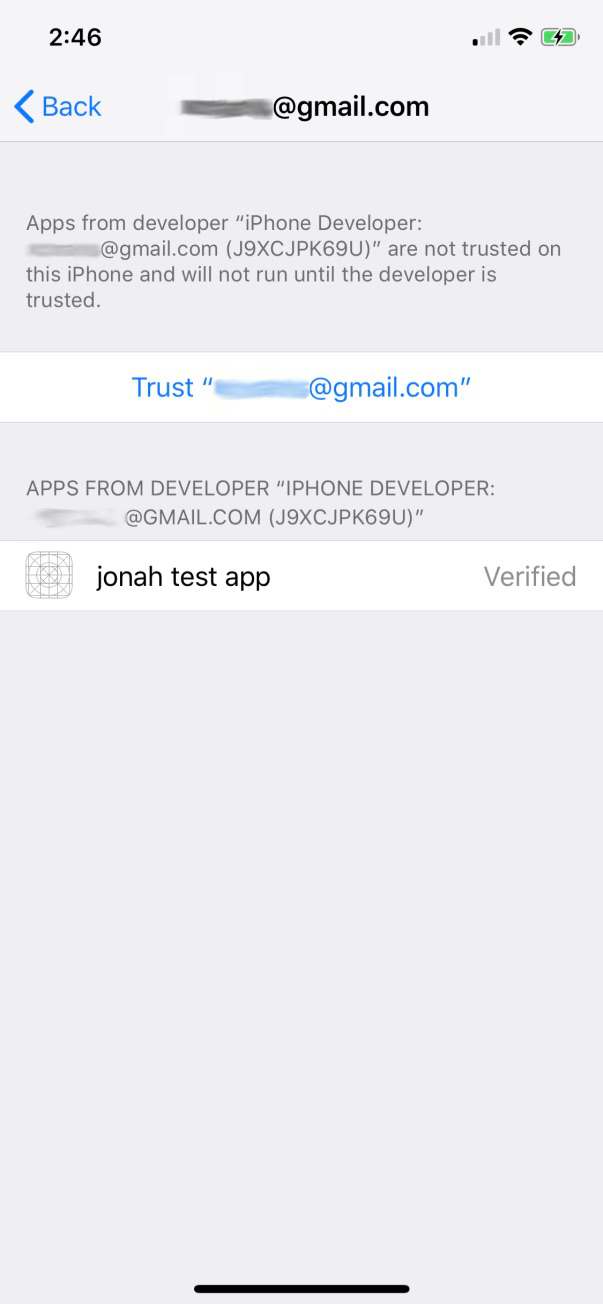
Then tap the blue link to trust the app we're trying to test.
By clicking the ▶ button in Xcode, the app now runs on our device!
There is a rather confusing issue I ran into, where Xcode asks us for our password while building our app. Typing the wrong password will cause the alert to shake disagreeably, but typing the correct password and hitting the return key seems to do nothing.
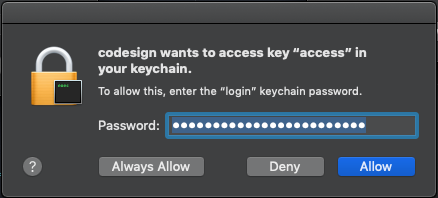
The sneaky issue going on here is that the default button activated by the return key is Allow, but we actually want to click Always Allow. Accidentally choosing Allow results in an identical popup appearing immediately. Dragging the window reveals another window underneath it. I really got myself into a mess this way.
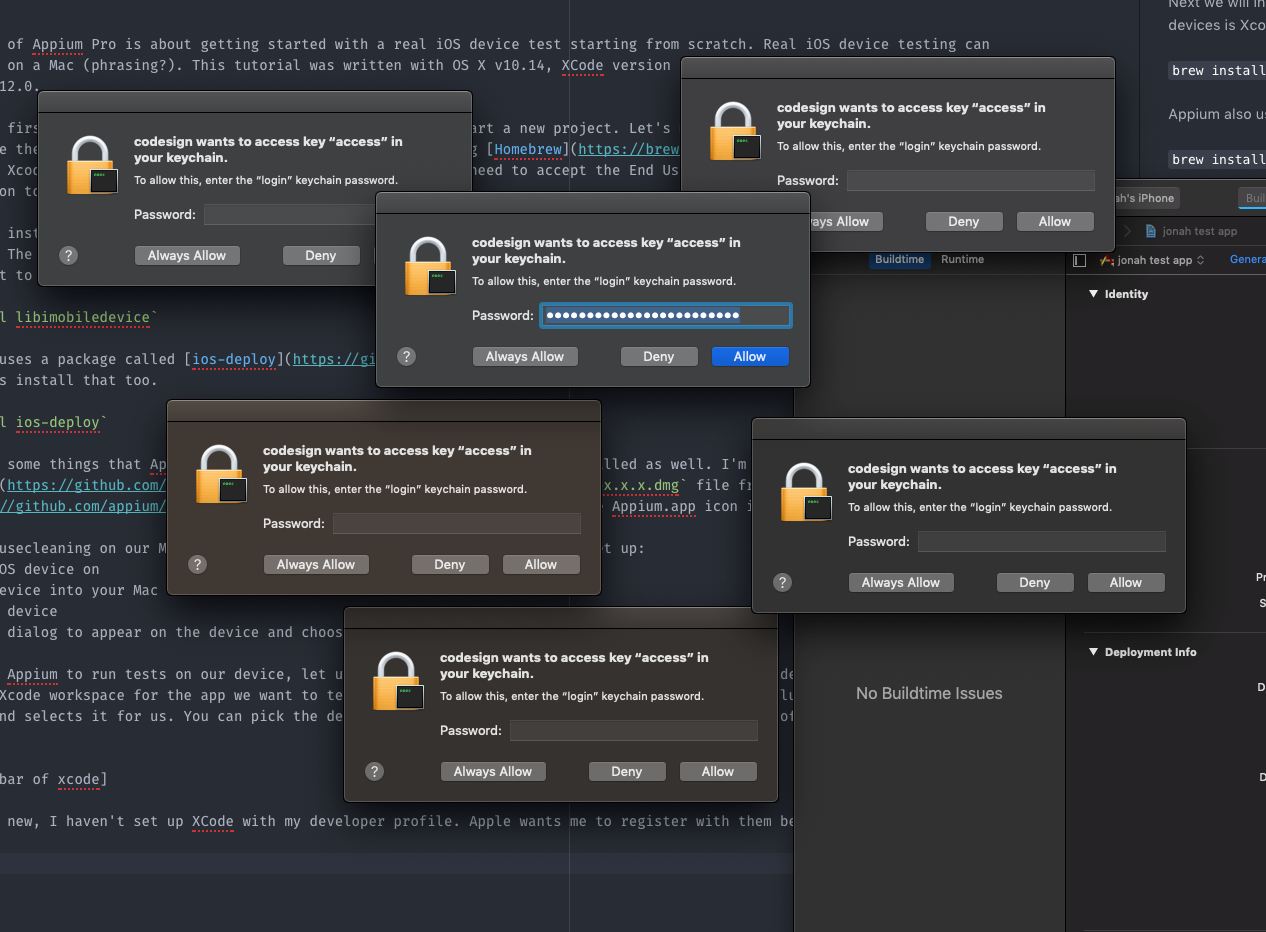
Don't worry, the simple but annoying solution is to patiently type your password and click Always Allow over and over until you work your way through all windows.
At this point, we have:
- Gotten a fresh set of system dependencies
- Linked our device with Xcode
- Linked our developer account with Xcode
- Linked our device with the developer certificate used to sign our app
- Launched our app manually on our device
Assuming this has all worked, we will be in good shape for Appium to automate our app. In the next edition in this series, we'll look at how exactly Appium ends up controlling your app, and the unique capabilities required to make it all work.