
Optimizing Image Element Thresholds
If you're automating an app which doesn't have standard UI elements that are easily findable using Appium's standard locator strategies (for example, if you're automating a game), then you might have checked out the "find by image" feature that has proven useful in recent versions of Appium. (If you're unfamiliar with finding elements by image and want a thorough introduction, check out the Appium Pro editions on finding elements by image, part 1 and part 2). In that series, I teased the intro with this image:
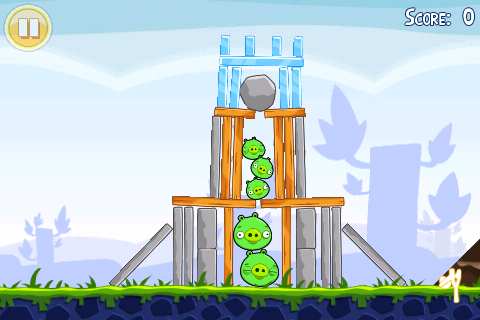
We didn't actually automate Angry Birds back then, but we will today! To navigate through the first level of this classic game, we'll need to find and interact with 2 screen regions, and then assert our victory by matching a third region. Here are the images we will use for the match:
 checkmark.png - this is a representation of the checkmark we'll need to tap to get from the mini tutorial to the first level, after the game has loaded for the first time.
  red-bird-in-slingshot.png - this is the red bird sitting in its slingshot, that we will need to construct an action around in order to shoot it at some (presumably deserving) pigs.
  level-cleared-three-stars.png - this is the image which is shown when we complete a level with flying colors, having destroyed all the pigs with some of our intrepid birds in reserve. We need to find this image to assert that our script has actually beaten the level.
Now, the way we send these images into Appium to look for matches is in Base64-encoded string format, so we need some helper methods to turn a local image path into a Base64-encoded string. I'm storing the images in a "queryimages" folder within the Appium Pro project, so my helper functions look like this:
private File getImageFile(String imageName) {
    return new File("queryimages/" + imageName + ".png");
}

private String getReferenceImageB64(String imageName) throws IOException {
    Path refImgPath = getImageFile(imageName).toPath();
    return Base64.getEncoder().encodeToString(Files.readAllBytes(refImgPath));
}
With this in hand, I would normally be able to just find and tap on the first image (the checkmark) with just a few lines of code:
String imageData = getReferenceImgB64("checkmark");
driver.findElement(MobileBy.image(imageData)).click();
This is great for the checkmark, but what about the red bird in the slingshot? We don't want to tap it; we want to tap, drag, and release it at just the right angle to destroy some stuff. To that end, I wrote another helper function entitled shootBird (the horrible things I do for you readers!), which takes the found bird element and constructs the appropriate low-level action using it:
private void shootBird(AndroidDriver driver, WebElement birdEl, int xOffset, int yOffset) {
    Rectangle rect = birdEl.getRect();
    Point start = new Point(rect.x + rect.width / 2, rect.y + rect.height / 2);
    Point end = start.moveBy(xOffset, yOffset);
    Duration dragDuration = Duration.ofMillis(750);

    PointerInput finger = new PointerInput(Kind.TOUCH, "finger");
    Sequence shoot = new Sequence(finger, 0);
    shoot.addAction(finger.createPointerMove(Duration.ofMillis(0), Origin.viewport(), start.x, start.y));
    shoot.addAction(finger.createPointerDown(MouseButton.LEFT.asArg()));
    shoot.addAction(finger.createPointerMove(dragDuration, Origin.viewport(), end.x, end.y));
    shoot.addAction(finger.createPointerUp(MouseButton.LEFT.asArg()));
    driver.perform(Arrays.asList(shoot));
}
There's a lot of code there, but it's fundamentally pretty simple: we just find the mid-point of the bird element and construct what is essentially a drag-and-drop action using that mid-point.
Finally, all we need to do to verify the victory is to check for the presence of our "stars" image:
imageData = getReferenceImgB64("level-cleared-three-stars");
driver.findElement(MobileBy.image(imageData));
In a perfect world, just this code would be enough to reliably beat the first level of Angry Birds. If you run it as is, however, you might encounter some "Element Not Found" errors. This is often because the default image match threshold set by Appium may not be appropriate for the particular image you want to find.
The threshold is a number between 0 and 1 that tells Appium how strict you want it to be in finding a match. If you use a threshold of 1, you are telling Appium to find a perfect pixel-for-pixel match (which will almost never occur in a real-world situation). If you're using a threshold of 0, you are telling Appium that any screen region is a good match---but that will likely result in false positive matches!
The question becomes, how do you know what threshold to use? As a general rule of thumb, I like a number in the neighborhood of 0.43 to 0.48. Just kidding! Well, not really. I do find that range useful---but you should never just take my word for it. What we should do is determine the threshold experimentally, for our particular set of images. We can do this during test development by creating a wrapper function for findElement, that performs a binary search over the threshold space, to figure out the highest threshold we can expect to find the image at.
In a "production" environment, we could do a lot of things with this threshold data. We could store it in a database along with the image templates themselves, so that a helper function can automatically update the threshold when we try to find different images. We could use it as a "baseline", à la baseline images in visual testing. But for now, we're just going to print it out to the console so we as test developers can use this information to adjust our thresholds.
(If you've never encountered or don't remember the concept of a binary search, now might be a good time to have a quick refresher). I call my threshold finder function findImageWithOptimizationNotes, and it looks like this:
private WebElement findImageWithOptimizationNotes(String imageName) throws Exception {
    String imageData = getReferenceImageB64(imageName);
    WebElement el = null;
    double max = 1.0;
    double min = 0.0;
    double haltSearchSpread = 0.05;
    double check = 0;
    NotFoundException notFound = null;

    while (Math.abs(max - min) > haltSearchSpread) {
        check = (max + min) / 2;
        driver.setSetting(Setting.IMAGE_MATCH_THRESHOLD, check);
        try {
            el = driver.findElement(MobileBy.image(imageData));
            min = check;
        } catch (NotFoundException err) {
            max = check;
            notFound = err;
        }
    }

    if (el != null) {
        System.out.println("Image '" + imageName + "' was found at the highest threshold of: " + check);
        return el;
    }

    System.out.println("Image '" + imageName + "' could not be found even at a threshold as low as: " + check);
    throw notFound;
}
Basically, we pass in the name of an image we want to find, and it uses a binary search to determine the highest threshold we can safely use to guarantee finding that image. (To keep the search from falling into Zeno's paradox, we stop when the binary search space becomes smaller than 0.05 threshold units). Here's how this function can be used:
public void testPigDestruction() throws Exception {
Thread.sleep(12000);
findImageWithOptimizationNotes("checkmark").click();
Thread.sleep(3000);
WebElement birdEl = findImageWithOptimizationNotes("red-bird-in-slingshot");
shootBird(driver, birdEl, -280, 140);
Thread.sleep(14000);
findImageWithOptimizationNotes("level-cleared-three-stars");
}You can see that findImageWithOptimizationNotes essentially replaces driver.findElement in my test. You might be wondering, though, why the Thread.sleeps all over the place? Isn't that a bad practice? Yes, when we are running tests. However, we're not really running a test at this phase; we're using our test framework to help us write tests. And in this context, we don't want to use explicit or implicit waits, otherwise our binary search will be forced to waste a lot of time, or we'll kick the search off before we know the element is actually visible. In this case, I've used my knowledge of how long it takes the game to transition between various screens in order to ensure that when the binary search starts, the image is displayed on screen. Needless to say, you'd want to rewrite this for an actual test that lives in CI.
Curious what thresholds worked for me? Here's what I got when I ran the code on my Android emulator:
Image 'checkmark' was found at the highest threshold of: 0.46875
Image 'red-bird-in-slingshot' was found at the highest threshold of: 0.59375
Image 'level-cleared-three-stars' was found at the highest threshold of: 0.53125
What these results mean is that I could set the threshold once at around 0.45, or I could reset it individually for the various elements according to their findability. Note that you might receive different values, based on differences in screen size or device. Working with image finding across devices, DPIs, and screen sizes is a whole other topic which we'll certainly cover in a future edition of Appium Pro.
Feel free to check out the full code sample on GitHub, but keep in mind that you'll need to have the Angry Birds APK installed on your Android device (since I'm pretty sure it's not legal for me to distribute it). Have fun!