
Edition 91
Getting Started With Appium For Android On Windows
We've discussed before how to use Appium to automate Windows desktop apps, but of course it's also possible to use Windows as the host environment for traditional mobile testing with Appium. It is not, unfortunately, possible to automate iOS simulators on Windows, because iOS simulators are only designed to run on macOS as part of Xcode. It is also not technically possible to work with real iOS devices plugged into a Windows machine, though some folks have figured this out. It's just not a supported use case.
What is supported is to run your Android tests with Appium on Windows! So let's take a look at all the steps required to support this kind of automation. (Note that I am assuming a recent install of the modern Windows 10 OS).
Requirements
Appium's requirements for Android testing on Windows are what you'd expect: basically the requirements for Android dev, plus Appium's own requirement for its runtime environment.
- A version of NodeJS supported by Appium (currently 10+, but typically the latest stable version), or Appium Desktop
- The Java Development Kit (JDK)
- Android Studio and related tools
System Setup
- Install NodeJS. (If you are going to run Appium Desktop, you can skip this step since Appium Desktop bundles its own version of Node. But I think it's a good practice to be able to run Appium from the command line, since you might want to run a beta version of Appium at some point. And don't worry--Appium Desktop's Inspector can talk to versions of Appium running on the CLI).
- Install the JDK. (I usually get Java 8 for compatibility with older test suites, but get whatever version works for you). Sorry, you'll have to do Oracle's signup/login dance. When you run the downloaded installer, pay attention to where Java is installed (for example, did it get put in the directory
C:\Program Files\Java\jdk1.8.0?). - Set the
JAVA_HOMEenvironment variable in your system settings. If you've never set an environment variable before, this is a good guide. Basically, we need to create a new variable with the nameJAVA_HOME, and the value equal to the path where the JDK was installed (e.g.,C:\Program Files\Java\jdk1.8.0). Once you've saved out of all the dialogs, open up a command prompt and typeecho %JAVA_HOME%. You should see your JDK path printed back out to you! Appium needs this in order to know where to find relevant Java binaries.
Appium Setup
- Start an Admin command prompt (type "cmd" into the Start menu and then hit CTRL+SHIFT+ENTER to launch the command prompt in Admin mode).
- Use the NPM binary installed with Node to download the most recent version of Appium:
npm install -g appium - Run Appium (ensuring I'm still in the Admin console!) to make sure it works.
appium
(NB: You'll always want to run Appium from an Admin console.)
For now, we can just kill the Appium server until we're ready to actually run a test.
Android Setup
- Download and install Android Studio. You can safely follow all the defaults during the installation.
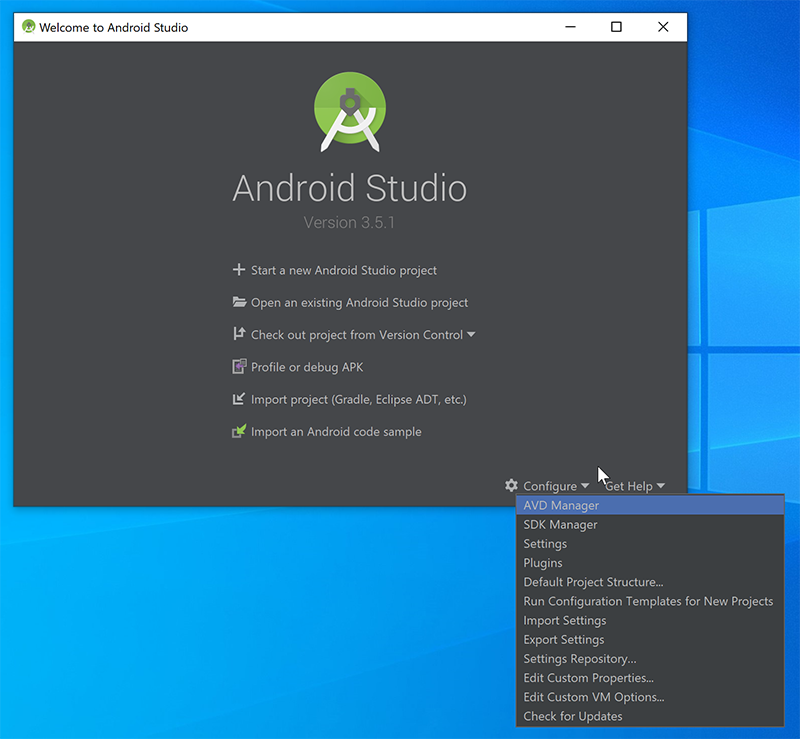
- Once Android Studio is launched, click the "Configure" menu option in the launch window, where you'll see two important items: "AVD Manager" and "SDK Manager". First, click SDK Manager.
- Once the SDK Manager is open, ensure that at least one Android SDK is installed. On this view, take note of the "Android SDK Location", since we'll need this location in a bit.
- Close the SDK Manager and open the AVD Manager. The AVD Manager is where we will create and launch Android Virtual Devices, otherwise known as emulators. When it launches, assuming you have no other devices already, you can click "Create Device" to begin the emulator creation wizard. The first screen you're presented with looks something like this:
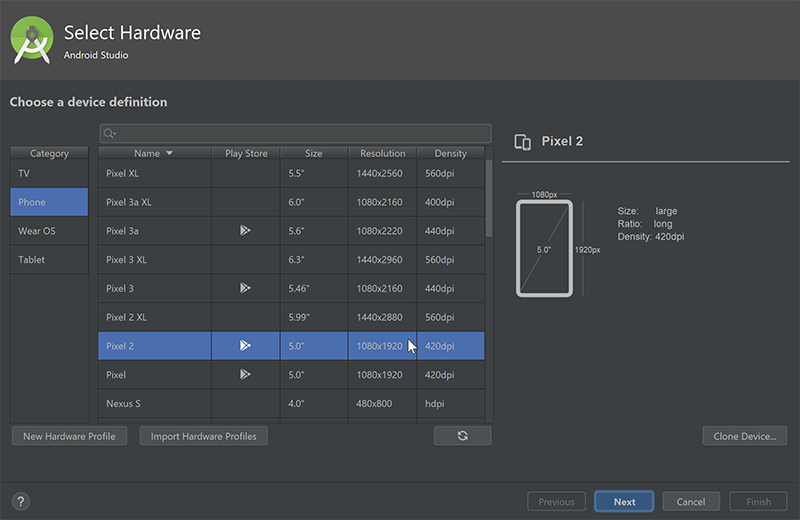
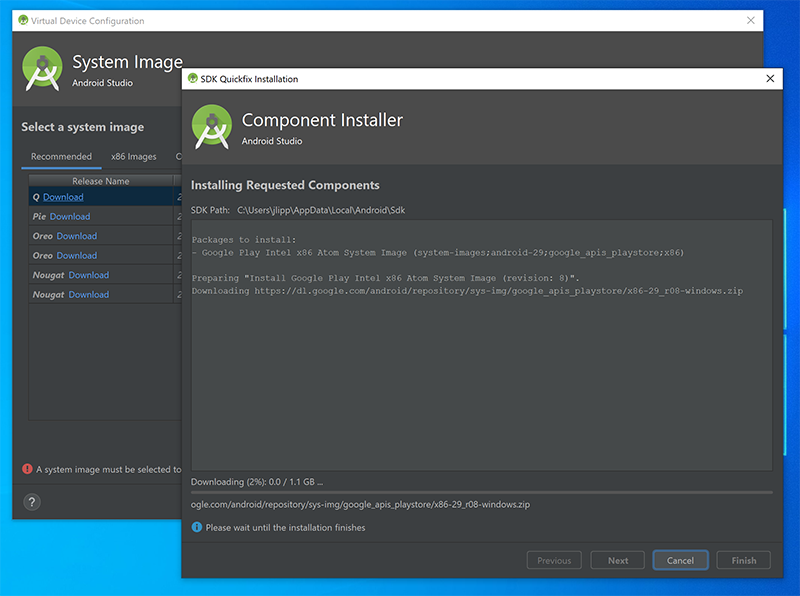
Here you can choose any device configuration preset. It doesn't really matter what you choose at this point, so pick something fun! - Next, work through the various other prompts. You can safely pick default values unless you happen to know you have other needs. When prompted for the system version of the emulator, you'll need to pick a system image that you have downloaded. If one is not already downloaded, click the "Download" link beside it to make it available for the emulator.
You can name the emulator whatever you want. - Once it's done being created, click the green play button looking icon to launch it! You'll see what looks like an Android device being booted. Let it boot fully and play with it a bit to make sure it works as expected.
- The last thing we need to do is make sure the location of the Android SDK is made available to Appium. We do this by creating another environment variable (like we did for
JAVA_HOMEabove). This one should be calledANDROID_HOME, and it should be set to the location of the Android SDK you saw in the SDK Manager window. - A technically optional but very useful final step is to add part of the Android SDK path to your system PATH, so that certain commands (like
adb) are available from a command prompt. To do this, go to the same place you did to edit the environment variables, but look for an existing variable called PATH. You can edit it, and tack this special string onto the end:;%ANDROID_HOME%\platform-tools. What is this doing? First of all, the semicolon separates this path segment from other ones that came before.%ANDROID_HOME%references the environment variable we previously set, and includes it as part of a path to a particular directory, where the programadb.exeresides. - Save out of all dialogs and open up another command prompt. Type
adb devicesand hit enter. If all configuration is correct, you will see some output from ADB telling you that you have one connected device, which is the emulator you booted up a moment ago. - One last useful tip is to add yet another directory to the path, this time
%ANDROID_HOME%\emulator, which gives you access to theemulatorbinary from the command line, in case you don't want to open Android Studio just to run your emulator. (If you do add this, make sure not to forget the;as a separator between paths).
Conclusion
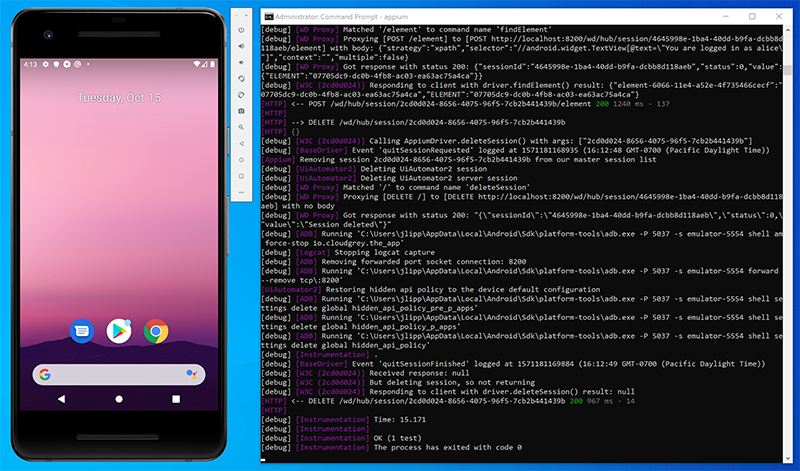
Let's review what we've done: we've installed basic system dependencies, the Appium server itself, and everything related to working with Android specifically. That means we're finished!
All that remains is to start the Appium server (just run appium from an admin command prompt), load up an Appium test in your editor of choice, tweak anything that needs to be tweaked for your system, and then kick off the test. If all goes well, you should see the Appium server spitting out logs and launching your app on the Android emulator!