
Edition 16
Automating the Clipboard on iOS and Android
Copying and pasting is one of those classic pairings, like peanut butter and jelly, or pizza and beer, or chips and guacamole. (Hmm, am I hungry?). For programmers, copying and pasting is bad---we should refactor our code instead. For users of mobile apps, copying and pasting is a wonderful way to save time typing and remembering. For this reason both iOS and Android platforms offer system-level clipboard capabilities, which apps can hook into to incorporate into their own functionality.
If you find yourself automating an app which has behavior tied to the clipboard, you might wonder how you can automate this behavior. As a first pass, you might try to do it the way a user would: by finding or typing some text, then long-pressing, then selecting the "copy" or "paste" context buttons which appear. Unfortunately, these buttons are "special" and don't show up in the automation hierarchy, which means this technique won't work reliably.
Thankfully, Appium now exposes getter and setter commands for the clipboard across both platforms. The specifics of the way the clipboard works, and what you can do with it, vary by platform (for example, setting image data is possible with the iOS clipboard). However, the basic flow of copying and pasting text works the same way across both platforms, and this is our topic for this article.
To showcase this type of automation, I've created version 1.4.0 of The App, which has a new "Clipboard Demo" view:
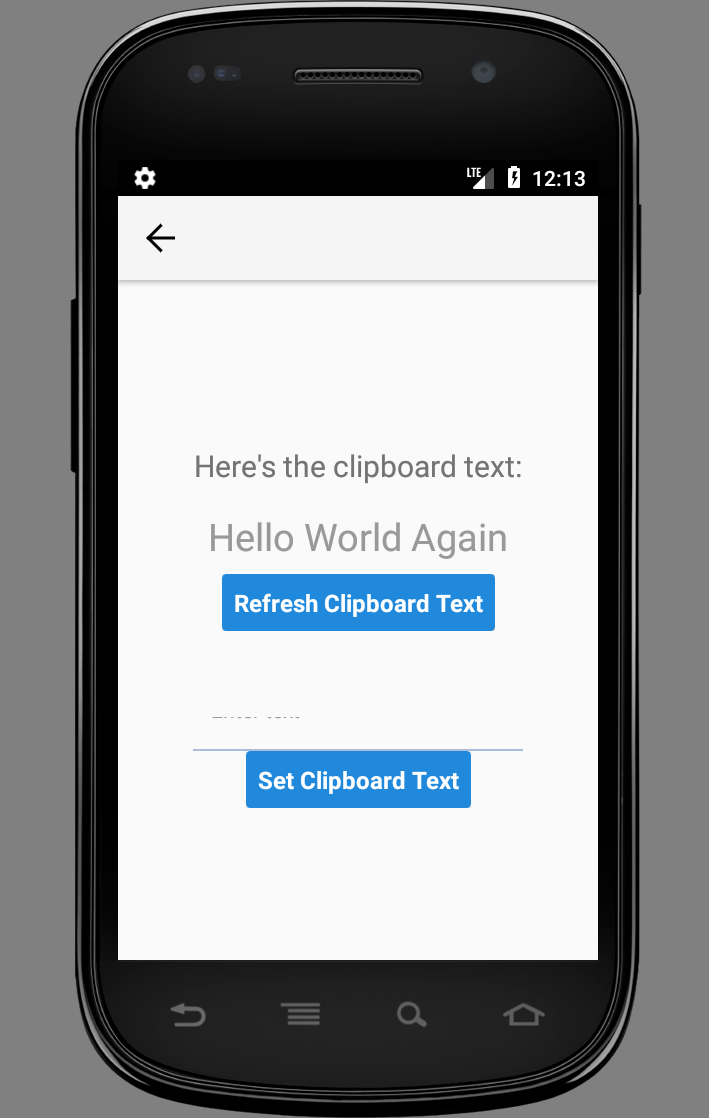
Basically, we can either tap the "Refresh" button and get the contents of the clipboard displayed on screen, or we can enter our own text into a text field and set that text as the text content of the clipboard. We'll use this little demo view to understand Appium's clipboard methods. Our test steps will look like:
- Set the clipboard text to "Hello World" using Appium
- Tap the "Refresh" button
- Verify that the text displayed on the view is "Hello World"
- Enter "Hello World Again" into the text field
- Tap the "Set" button
- Get the clipboard text using Appium
- Verify the clipboard text was "Hello World Again"
These test steps prove that our app does exactly what it purports to do (which is admittedly pretty dumb).
Eagle-eyed testers will have noticed that the seven steps above actually constitute two tests, one that proves our app correctly displays the clipboard text and one that proves it correctly sets it. Let's take steps 1-3 first, and look at how we would write it up in an Appium script:
String text = "Hello World";
driver.setClipboardText(text);
driver.findElement(refreshClipboardBtn).click();
Assert.assertEquals(driver.findElement(clipboardText).getText(), text);
(Here we assume we've got some By locators all ready for us to use). The magic method is driver.setClipboardText, which enables us to set the clipboard text to anything we want. We're able to use this technique to prove beyond a shadow of a doubt that when we hit the "Refresh" button the displayed text actually came from the clipboard.
And of course this method has a twin, which enables the second test (steps 4-7):
text = "Hello World Again";
driver.findElement(clipboardInput).sendKeys(text);
driver.findElement(setTextBtn).click();
Assert.assertEquals(driver.getClipboardText(), text);
Here, all we're doing is entering a unique string into the text field, and hitting the "Set Clipboard Text" button. Then, we're using Appium's getClipboardText method to retrieve the clipboard text from the device, so we can verify it was actually set via the app. If the strings match, we've proved our app was able to set the clipboard text successfully.
That's all there is to it! This works in a fully cross-platform manner, as our full example will show, with tests for each of iOS and Android that both call out to the same automateClipboard method:
import io.appium.java_client.AppiumDriver;
import io.appium.java_client.MobileBy;
import io.appium.java_client.android.AndroidDriver;
import io.appium.java_client.clipboard.HasClipboard;
import io.appium.java_client.ios.IOSDriver;
import java.io.IOException;
import java.net.URL;
import org.junit.Assert;
import org.junit.Test;
import org.junit.runner.RunWith;
import org.junit.runners.JUnit4;
import org.openqa.selenium.By;
import org.openqa.selenium.remote.DesiredCapabilities;
import org.openqa.selenium.support.ui.ExpectedConditions;
import org.openqa.selenium.support.ui.WebDriverWait;

@RunWith(JUnit4.class)
public class Edition016_Clipboard {

    private String ANDROID_APP = "https://github.com/cloudgrey-io/the-app/releases/download/v1.4.0/TheApp-v1.4.0.apk";
    private String IOS_APP = "https://github.com/cloudgrey-io/the-app/releases/download/v1.4.0/TheApp-v1.4.0.app.zip";
    private String AVD_NAME = "emu27";
    private String APPIUM_SERVER = "http://localhost:4723/wd/hub";

    private By clipboardNav = MobileBy.AccessibilityId("Clipboard Demo");
    private By refreshClipboardBtn = MobileBy.AccessibilityId("refreshClipboardText");
    private By clipboardInput = MobileBy.AccessibilityId("messageInput");
    private By setTextBtn = MobileBy.AccessibilityId("setClipboardText");

    @Test
    public void testClipboard_Android() throws IOException {
        DesiredCapabilities capabilities = new DesiredCapabilities();
        capabilities.setCapability("platformName", "Android");
        capabilities.setCapability("deviceName", "Android Emulator");
        capabilities.setCapability("automationName", "UiAutomator2");
        capabilities.setCapability("avd", AVD_NAME);
        capabilities.setCapability("app", ANDROID_APP);

        AndroidDriver driver = new AndroidDriver(new URL(APPIUM_SERVER), capabilities);
        automateClipboard(driver);
    }

    @Test
    public void testClipboard_iOS() throws IOException {
        DesiredCapabilities capabilities = new DesiredCapabilities();
        capabilities.setCapability("platformName", "iOS");
        capabilities.setCapability("platformVersion", "11.3");
        capabilities.setCapability("deviceName", "iPhone 7");
        capabilities.setCapability("app", IOS_APP);

        IOSDriver driver = new IOSDriver(new URL(APPIUM_SERVER), capabilities);
        automateClipboard(driver);
    }

    private void automateClipboard(AppiumDriver driver) {
        WebDriverWait wait = new WebDriverWait(driver, 5);

        try {
            wait.until(ExpectedConditions.presenceOfElementLocated(clipboardNav)).click();

            String text = "Hello World";
            ((HasClipboard) driver).setClipboardText(text);
            wait.until(ExpectedConditions.presenceOfElementLocated(refreshClipboardBtn)).click();
            By clipboardText = MobileBy.AccessibilityId(text);
            Assert.assertEquals(driver.findElement(clipboardText).getText(), text);

            text = "Hello World Again";
            driver.findElement(clipboardInput).sendKeys(text);
            try {
                driver.hideKeyboard();
            } catch (Exception ign) {}
            driver.findElement(setTextBtn).click();
            Assert.assertEquals(((HasClipboard) driver).getClipboardText(), text);

        } finally {
            driver.quit();
        }
    }
}
In this example, we have two tests, one for iOS and one for Android, each of which is responsible solely for setting up its unique capabilities. Then, the heavy lifting is done by the automateClipboard method, which simply takes an AppiumDriver and works its magic. Because we don't have an instance of IOSDriver or AndroidDriver specifically, we have to cast our driver instance to HasClipboard in order to make sure we still have access to the clipboard methods (which properly belong only on the platform-specific drivers). And of course, in the full example, we use explicit waits to make sure we don't run into any timing issues with element presence.
If you fancy a deeper look at the code, you can always visit its home on GitHub.