
Edition 100
Visual Testing With Appium, Part 3
This post is the third in a 3-part series on visual testing with Appium. Visual testing is an important category of testing and can catch visual regressions as well as functional bugs. The inspiration for this series comes from a free online video course on mobile visual testing I produced for Test Automation University. Check it out! (And don't forget to read the first and second parts in this series first).
In Part 1 of this series, we put together our own homebrew visual testing solution. In Part 2, we discussed 4 limitations of that simple solution, and showed ways to ameliorate some of those difficulties by taking advantage of the Applitools visual testing SDK. We did not, however solve all of the problems. There are a couple issues (which we listed out earlier) still remaining that we need to address:
- Applitools does take care of some annoying ever-changing bits of the device screen. By default, for example, we will not run into any issues with the device time changing. But what about content inside our app that changes from test to test?
- The equivalent of "full-page screenshots"--so far, we haven't seen how to take screenshots and make comparisons using all of the items in a list view.
Enabling full-page visual comparison
Let's take #4 first, since it's relatively easy to address within the context of the Eyes SDK. It's actually just an SDK flag; to have Applitools automatically scroll any scrollable views and stitch together content to form one long screenshot, call the setForceFullPageScreenshot command with the value true:
eyes.setForceFullPageScreenshot(true);
The reason this functionality is not enabled by default is that there is a certain amount of overhead involved in detecting scrollable views and then in actually scrolling them, so it should be turned on only when you know the comparison will be worth the extra time. Of course, you can also turn it on and off throughout the course of a test.
Let's take a look at this functionality in action. The two versions of my test app that we've been using in examples so far both contain a home screen with a number of elements on it. What happens if I run a visual test comparing the home screen of V2 of the app with the baseline generated from V1 of the app? The code I'm running looks something like this:
@Test
public void testHomeScreen() {
    eyes.open(driver, "TheApp", "appium pro home screen scroll test");

    // wait for an element that's on the home screen
    waitForElement(wait, LOGIN_SCREEN);

    // now we know the home screen is loaded, so do a visual check
    eyes.checkWindow(CHECK_HOME);
    eyes.close();
}
This is about as simple a test as we can imagine; it just waits for an element to appear on the home screen, and performs a visual check. When I run this test on Applitools, I get a visual differences warning. This is to be expected, because I have added some items to the home screen in V2 of the app. But have a look at the Applitools page where I go to have a look at the differences:
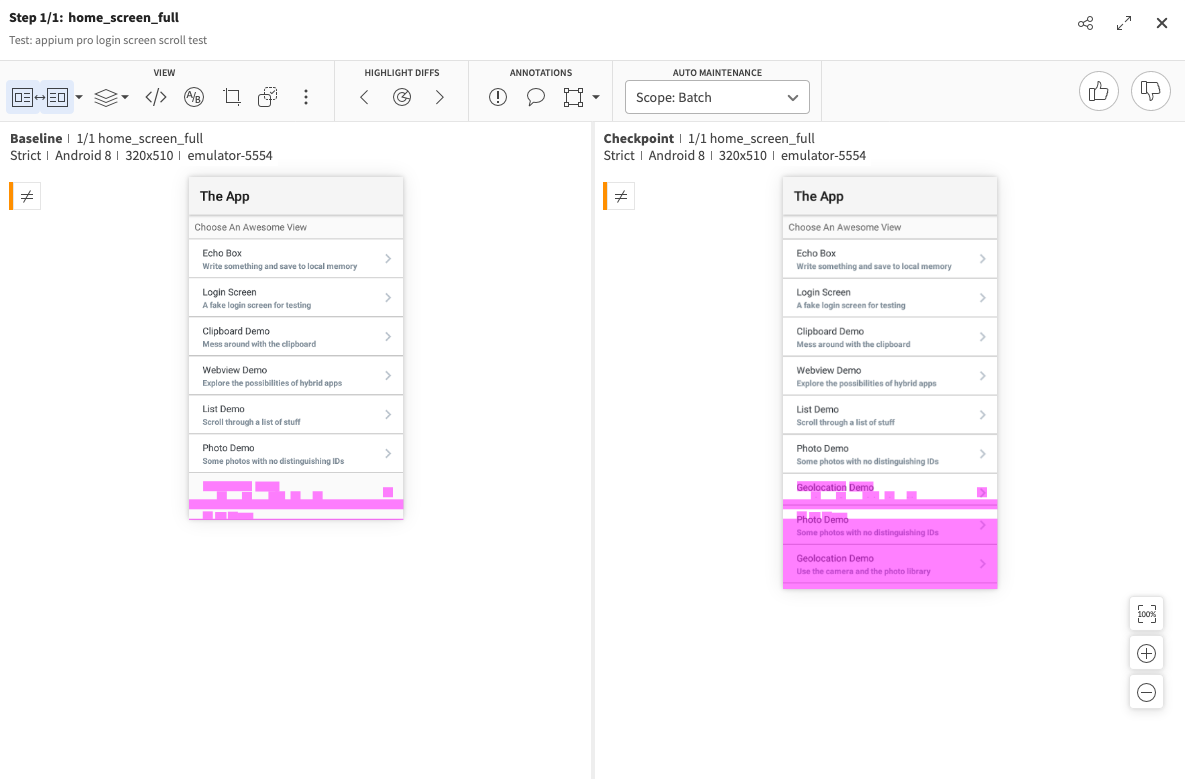
Notice that the screenshots are of very different heights. This is because, with V2 of the app, we scrolled the home view to make sure to catch all the different elements. Thus here we get a really good view of everything that changed. Without full-screen scroll, we might notice a change, but not the extent of it. And if we had a V3 of the app which added even more items, we wouldn't notice any differences at all without scrolling.
Ignoring unimportant visual differences
The final problem we want to solve in order to have ourselves a nice and robust visual testing pipeline is the problem of false positives. How can we make sure our visual testing logic isn't tripped up by visual differences that don't actually mean anything?
For example, in our test app there is a little "echo screen" that takes some user input and then displays it back on the screen. We could write a little functional-plus-visual test of this functionality with some code like that below:
@Test
public void testEchoScreen() {
    String msg = "hello";
    eyes.open(driver, "TheApp", "appium pro echo screen test");

    wait.until(ExpectedConditions.presenceOfElementLocated(ECHO_SCREEN)).click();
    wait.until(ExpectedConditions.presenceOfElementLocated(MSG_BOX)).sendKeys(msg);
    driver.findElement(SAVE_BTN).click();
    WebElement savedMsg = wait.until(ExpectedConditions.presenceOfElementLocated(MobileBy.AccessibilityId(msg)));
    Assert.assertEquals(msg, savedMsg.getText());

    eyes.checkWindow(CHECK_ECHO);
    eyes.close();
}
This code is nothing new; it just finds and interacts with elements in very standard ways. The first time we run this test, there are no visual errors. In fact, we could run it again and again, and there would be no problem. But what if, to satisfy some external requirement, we needed to change the msg variable to contain a different string, like "world" instead of "hello"? The next time we run the test, we'll be greeted with visual differences that trigger a warning:
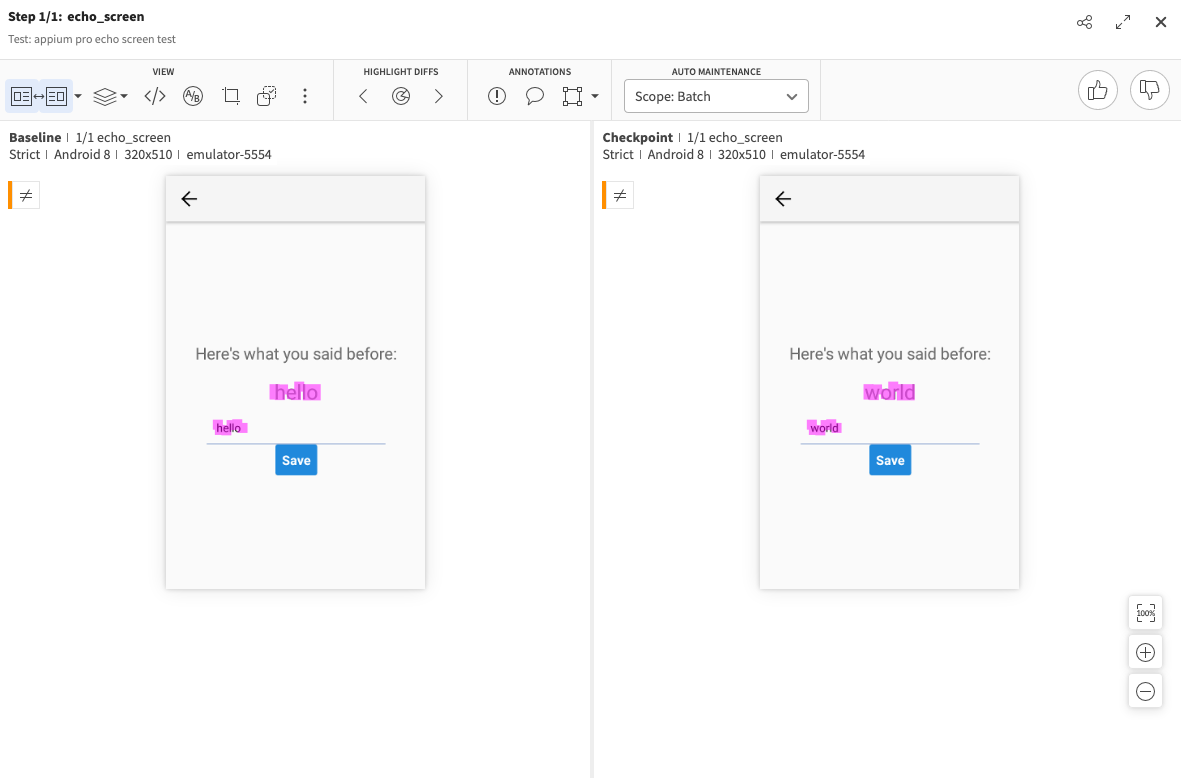
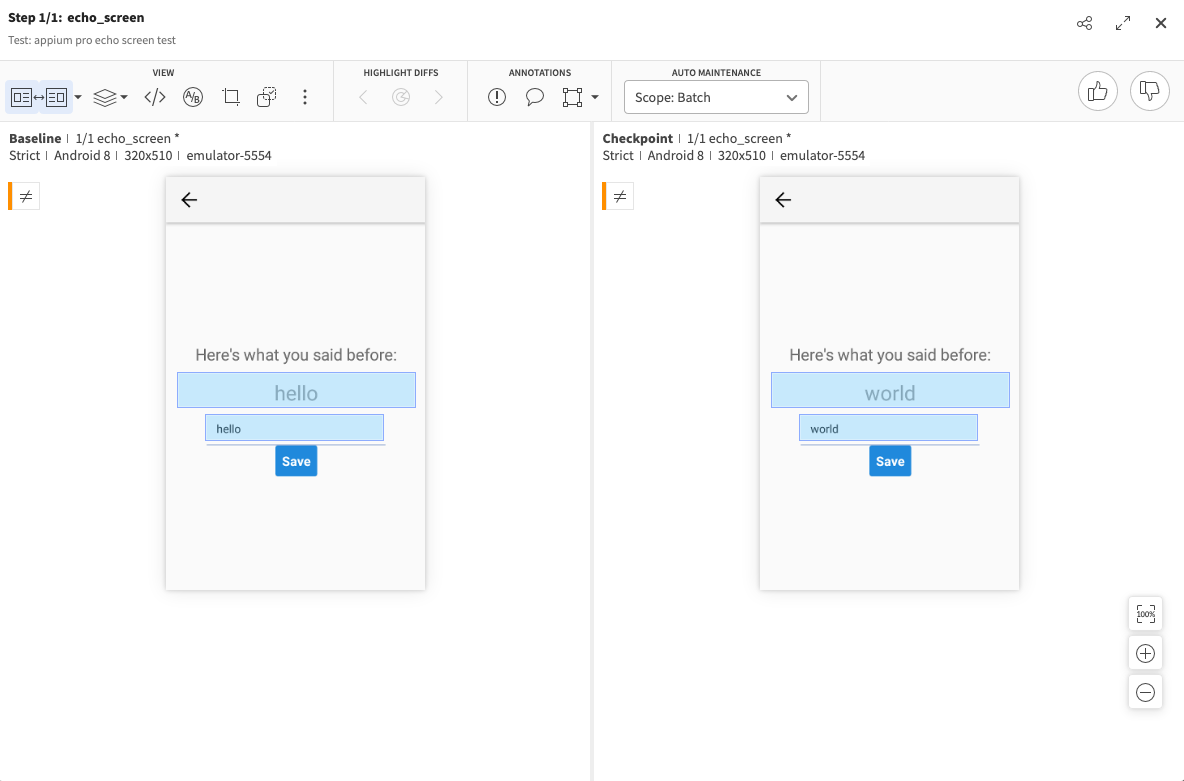
This is reasonable, but tedious. We didn't really change anything about the visual design of the app, and this is not a bug. So why waste our time looking at false positives like these? We can actually direct Applitools to ignore regions of the screen that change frequently or only with content that is unimportant to visual testing. To do that, we simply choose the "ignore region" tool and draw boxes around the areas we don't care about tracking:
Once we save these regions and the baseline, we can update our code again (maybe making the msg variable contain the string "Appium"), and rerun the test. This time, we don't get any notice of visual difference, and if we log into the Applitools app, we can see that the check was marked automatically as "passed", even though we can see quite clearly that the strings differed between the two runs:
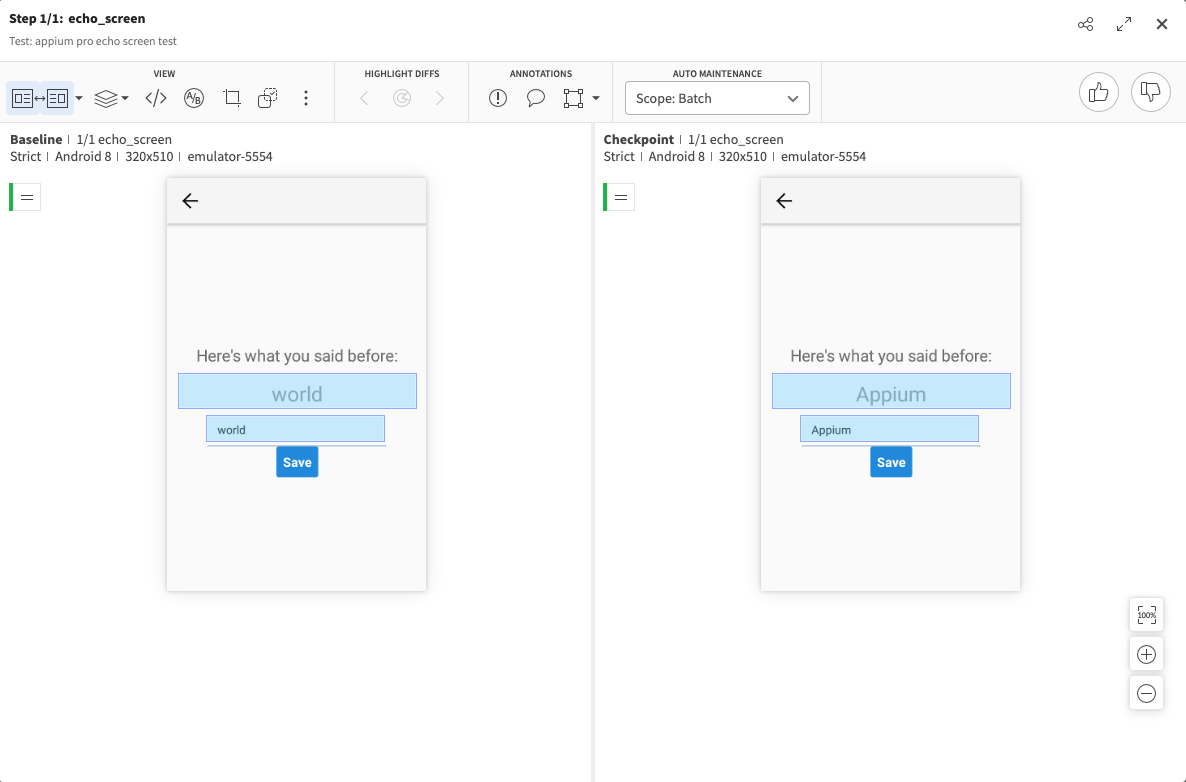
This is exactly what we want! Now we've decoupled the text used in the functional aspect of the test from the visual checks. If you want to see the code for both of the above sections in the context of a runnable project, you can check it out on GitHub.
Visual testing conclusion
In this 3-part series, we've seen how to use Appium's built-in image processing technology (powered by OpenCV) to build out some basic visual testing capabilities. We've also looked at the main problems that are important to solve in order to have a functional, maintainable, and robust visual testing framework. Thankfully, projects like Applitools exist which provide some of these solutions in an off-the-shelf fashion through the use of language-specific SDKs. Of course, you could also go the route of finding solutions to the basic framework's limitations on your own or through a combination of other tools. Either way, I hope this series has encouraged you to get started with adding at least a few visual tests to your build, if you don't have any yet! And if you want a more in-depth version of these brief tutorials, don't forget to check out my mobile visual testing course on Test Automation University.